In this post we take you through the stages we used to construct a warm flat EPDM rubber roof i our garage to annex conversion. This meets the current building regulations. There are many ways to construct a warm flat EPDM rubber roof and the materials we used were based on quality rather than cost.
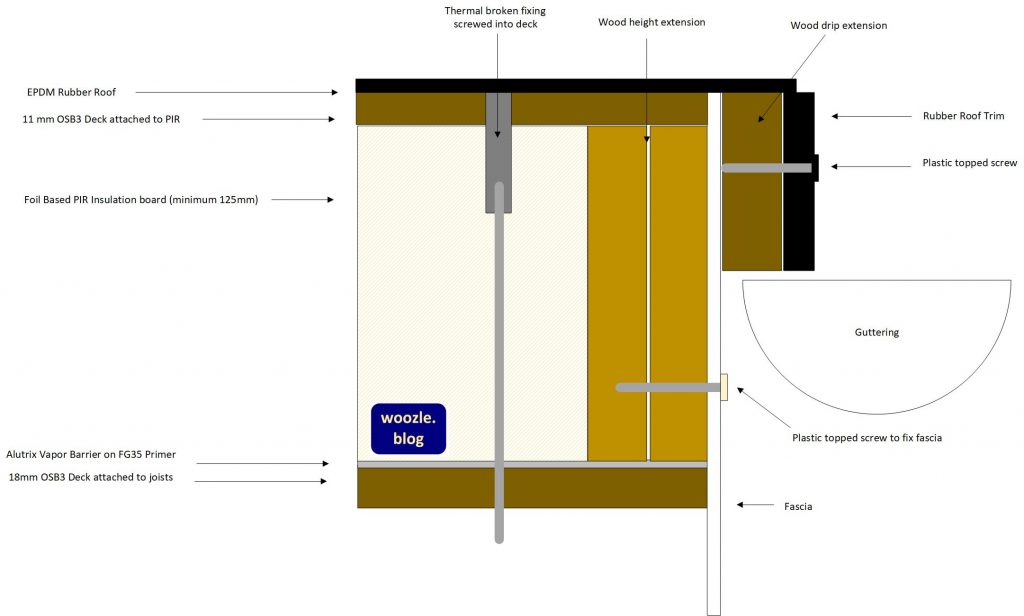
The method we are going to use comprises of the original deck, vapour barrier, PIR insulation , new deck and rubber roof. Make sure it is suitable for your requirements and that the manufacturers instructions are adhered too. This is how we constructed our roof:
Step 1: Remove the old roof material
To construct a warm flat EPDM rubber roof you firstly need to consider why you are doing this. If you have an existing roof that is in good condition, you may want to use this as the vapour barrier. In our case we had a felt roof, and it was only when we starting deconstruction we realised how much it must have been leaking. We had a felt roof so I removed it using a spade. In the process bitumen marked the UPVC window, glass and brick. If this happens to you we have instructions on how to remove it here.

Step 2: Inspect and Replace Deck and Joists
There is no point building a new roof on old damaged deck. We replaced parts of the deck that was rotten with new OSB3 boards . Removing these rotten boards then uncovered damage to joists so we also ended up replacing two of these. As these were required quickly we were constrained with stock in the local store which was too short. If you need to make a longer joist you can watch our video here.
Step 3: Primer the Boards with FG35
Having replaced the boards the next stage to construct a warm flat EPDM rubber roof requires covering them with primer. FG35 primer is recommended for use with Alutrix Vapour Barrier. You can see our video here on how we applied this. We found the best method was to brush it on with a shed brush.
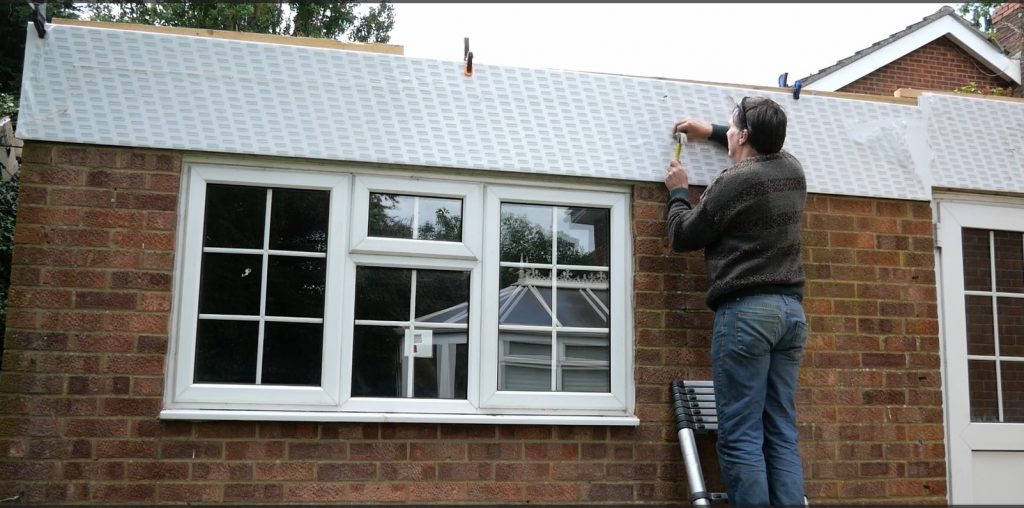
Step 4: Fit Alutrix Vapour Barrier
After the FG35 primer is a hard tack suitable to walk on it is now possible to lay the Alutrix Vapour barrier. Ensure you don’t being gravel up on your feet. Its best to use rubber soled shoes as you are less likely to stick. Using a pair of scissors cut enough Alutrix off to fit. Peel back the backing tape and stick to the wooden deck,. Ensure to overlap each sheet by the indicated amount. To install Alutrix you will probably need to be wearing shades, and suntan cream as there is significant solar reflection.
At this stage of the build the roof is water tight and if the weather breaks can be left. Do not proceed to the next stage until you are ready to finish the job as this will make a swimming pool!
Step 5: Extend the wall perimeter with wood
Extend the wall perimeters upwards by the height of the insulation, in our case it was 150mm. When fixing avoid going through the Alutrix and attach to the side of the building. Brackets all the corners and ensure a firm stable finish.

Step 6: Fit the fascia board
Selecting the fascia board will be indicated by the height of the top of the insulation to where on the brickwork it needs to run. In our case the height was to great for fascia board and the only choice was soffit board or cladding. Soffit board is the quicker cheaper option. Hollow soft board is not weatherproof. If using sofit board lift into place and clamp. Hammer in plastic headed nails to afix.
Step 7: Fit the roof extension for water drip
If you have a gutter, then you can ensure the water drains into this by building an extension. To do this you need to use treated timber and attach it to the top of the facia board so that it protrudes and water woyld fall off into the gutter. Ensure it just overlaps the gutter at this point, as there is still rubber roof trim to be applied.
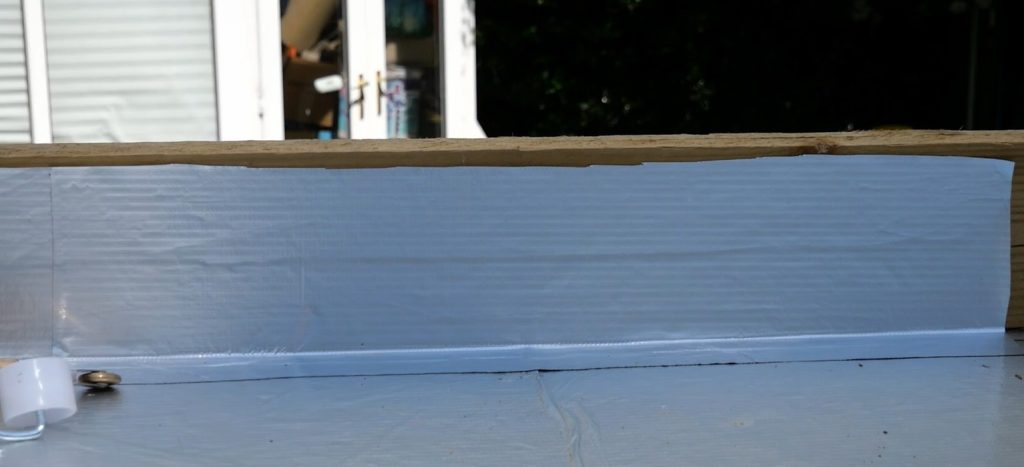
Step 8: Alutrix the inside of the wood height extension
Cut strips of Alutrix to overlap on the existing deck and go up the side of the height extension. To do this you will need to use a penny roller to get a good right angle bend and seam roller to fix to all the wood firmly. At this point no water can drain out from your roof.
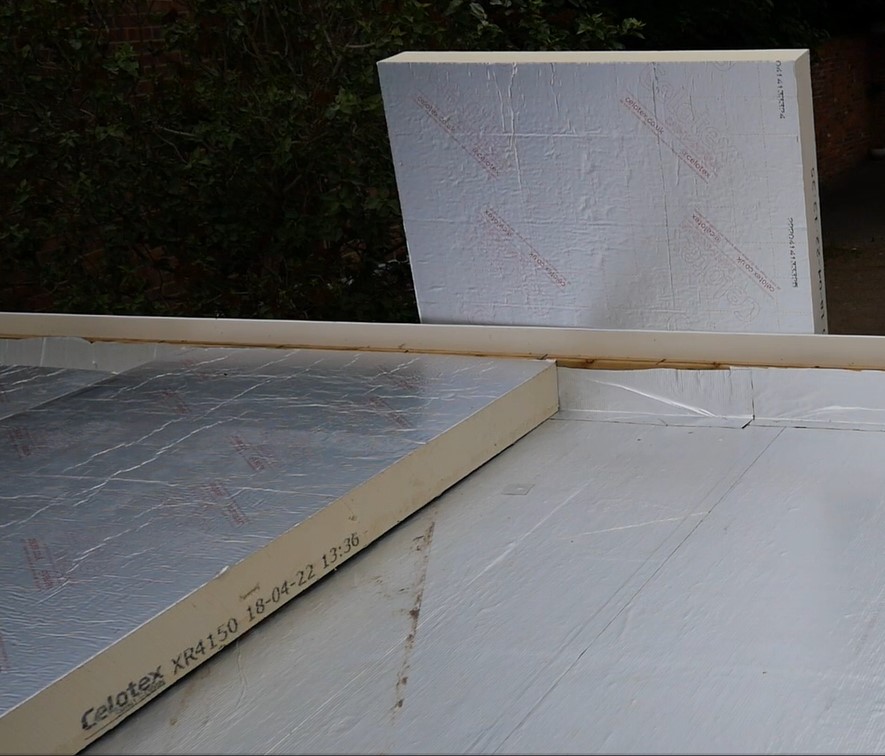
Step 9: Fill with PIR insulation board
Fill the roof with PIR insulation board in a break bonded fashion. The insulation must be tightly packed together. If you need to cut any use a wood saw. Ensure the branding is pointing face upwards.
Step 9: Fill gaps with Expanding foam
Fill the gaps with expanding foam. This will expand over the board but remove any overspill with a flat bladed knife.
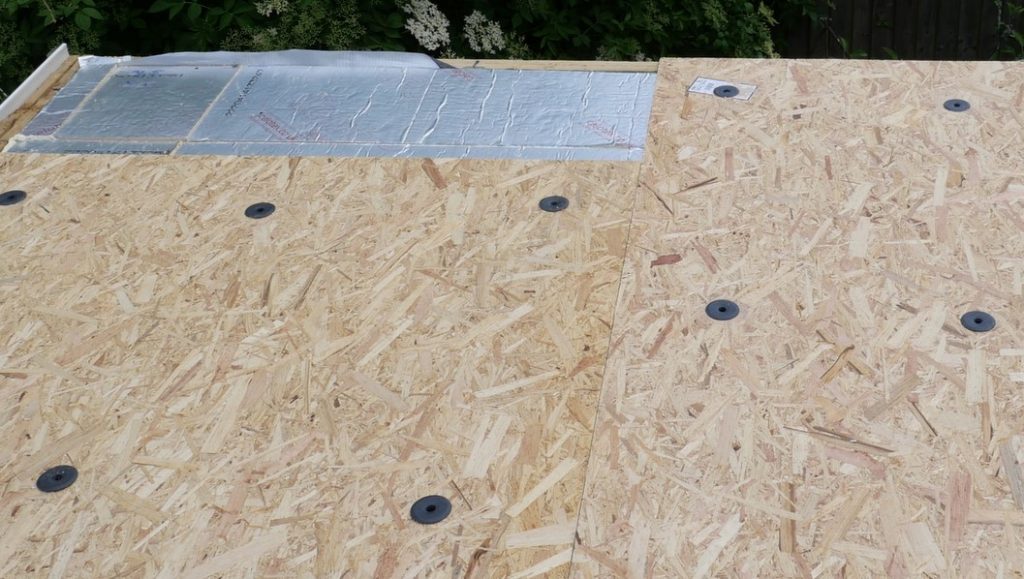
Step 10: Build a new deck over the insulation
The next job is to build a new deck over the insulation. This should be designed to take the load required. On our roof there would be little load so we opted for a lighter 11mm OSB board. This needs fastening to the original deck using thermal broken fittings.
Step 11: Lift and rest the EPDM rubber
Don’t under estimate the weight of the EPDM rubber. We opted for commercial grade. The weight of this was in excess of what I can lift for only 25m2. Find a method to get this on the roof. In the end we rigged a pulley system but there are other equally genius systems. The weight of the rubber put my heart out of rhythm so take care! Now unroll the rubber, again this is initially a heavy job. Once in place check the over hangs on each side. Hint: we added an additional 10cm’s to manufacturers calculation and was glad of the extra excess which meant our positioning did not have to be so careful. But this adds to the cost. The EPDM needs to rest as advised by the manufacturer.
Step 12: Glue down the EPDM rubber
Use the advised glue for the system of rubber chosen. Instructions may vary . Roll back the EPDM to the half way mark. Draw a mark of about 10cm of the edge of the deck which is where you need to glue to. Starting near the roll paint on the glue to the deck in 1 meter strips. Unroll the rubber onto this strip and ensure adhesion. Repeat for the other side. Consider how you are going to do this because at some stage you will need to move the ladder so don’t get stranded. We advise you always have a mobile when working on the roof so you can call for assistance if needed.
Step 13: Glue the edges of the EPDM
Use the advised glue . You will now be gluing down the last 10cm of rubber. Take care as you are working on the edge of the roof with chemicals. Make sure oyu don’t drip any glue down the facia board.
Step 14: Nail in the edge trims and glue in the corners
Nail in the edge trims using plastic topped nails. Cut any to size with a saw. Super glue in the corner pieces. Over any joins of the trims there will be plastic clips to hide the join.
Congratulations – you now have a new rubber roof!